I am currently in the middle of working on a project that involves configuring a NetMRI appliance and a accompanying event collector. So far I am finish configuring the appliance along with a test switch "Cisco 3560".This blog posting will briefly go over some of the steps I took to accomplish this task.
What is NetMRI?
NetMRI enables organizations to take control of network configurations
and changes–making it easy to identify hard-to-find configuration
problems that are lurking in the network and meet internal standards and
external compliance requirements. Instead of just logging changes,
NetMRI utilizes built-in subject matter expertise to audit, analyze and
automate network change.
Prior
to starting the configuration process for the NetMRI appliance you need to
install an SSH client and have a cross over cable, or a switch with the correct VLAN configured. NetMRI always listens on the private IP address 169.254.1.1,with
subnet 255.255.255.0. Simply configure your machine to 169.254.1.3 or any
address in that range within this range that’s lower than .254 with a subnet of
255.255.255.0.
Once
you are finish try to ping 169.254.1.1 if you are able to communicate with the
appliance you can use your favorite SSH client and connect to the appliance on
port 22 using the following credentials
admin/admin and from there run the “configure server” command.
During
this process you will be asked several questions:
·
Network , Server and Domain name
·
Two DNS address
·
Time server/ time zone
·
Management port IP address and gateway
·
Scanning port IP address an gateway if you choose to use both
ports
Once you are
finish you can now login into the appliance using the newly assigned IP address
that was selected during the setup above. Ex http://172.29.19.4
Select next to continue.
Step 1: Chose a new admin password.
Choose a difficult password, since the username cant be changed its advisable to use a password that's not easily guessed.
Choose a difficult password, since the username cant be changed its advisable to use a password that's not easily guessed.
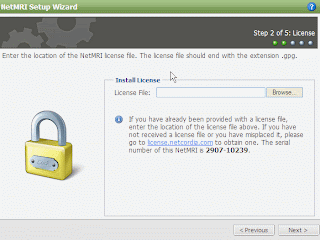
Step 2:
License file
Browse to the location on your computer where you have the file and click next.
Browse to the location on your computer where you have the file and click next.
You can either add a whole subnet or individual IP addresses using a /32 at the end of the IP address.
Setp 4:
Community Strings
Here is where you will enter the string that you will be configuring on your router and switches.
Here is where you will enter the string that you will be configuring on your router and switches.
Step 5: CLI
Credentials
Here
is where you need to enter the user name and password that the NetMRI appliance
is going to be using to access your infrastructure devices; you will also need
to enter your Enable password here to.
Once
you are done click finish.
After the NetMRI setup process
has been completed, review the Network Explorer tab > Inventory tab
> Devices / Interfaces section > Devices page. If the
Default Gateway, CIDR blocks, SNMP credentials and Telnet/SSH credentials were
entered correctly, you should start to see devices listed in this table within
a few minutes. Periodically refresh your browser to see the progress of the
discovery process.
Troubleshooting
Troubleshooting
If you don’t see any devices
within a few minutes, you should verify the accuracy of the network information
added during the configuration process as follows:
1. In the NetMRI header panel,
click the Settings button. In the menu along the right side of the Settings
window, click the Setup section, then click Discovery Settings.
Ensure that the given CIDR blocks cover the desired parts of your network.
Also, ensure that the Default Gateway is covered by one of the Included CIDR
blocks, but not by one of the Excluded CIDR blocks.
2. In the menu along the right
side of the Settings window, click Collectors and Groups (just
above Discovery Settings). Ensure that SNMP collection is
Enabled. In the Settings window, click SNMP Credentials and
verify that the community strings for your network devices are entered properly
(e.g., check spelling and case-sensitivity).
3. If NetMRI was configured using
a crossover Ethernet cable and NetMRI was not on the network following
completion of the configuration process, then NetMRI may not have been
successful in its initial probes of the network. Navigate to Settings >
Settings section > Discovery Settings page and click the Reset
Discovery Counters button (below the table) to kick off the initial network
probes again, then continue to monitor the discovery process as before.
Any changes made using the forms described
above will be automatically used by the discovery process. If the new
information is correct, you should start to see devices appearing in the table
at Network Explorer tab > Inventory tab > Devices /
Interfaces section > Devices
Cisco Device Configuration
Create Username on the Cisco 3560
switch
======================================
username mriuser password 7
aaa new-model
aaa authentication login default
local
Configure SNMP Cisco Catalysis
3560
===================================
config t
snmp-server group nmri v2c read mrigp
snmp-server community mr131 RO
snmp-server user mriuser nmri
v2c
snmp-server enable traps syslog
Doing an SNMP Walk
In order to do a SNMP walk you
need to replace the Root OID system with 1.3.6.1.2.1.1.
Reference links:


Great post. Thank you!
ReplyDeleteThank for the comment Noah, I am actually setting up the NetMRI Event collector as we speak. Another followup post will soon follow.
ReplyDelete